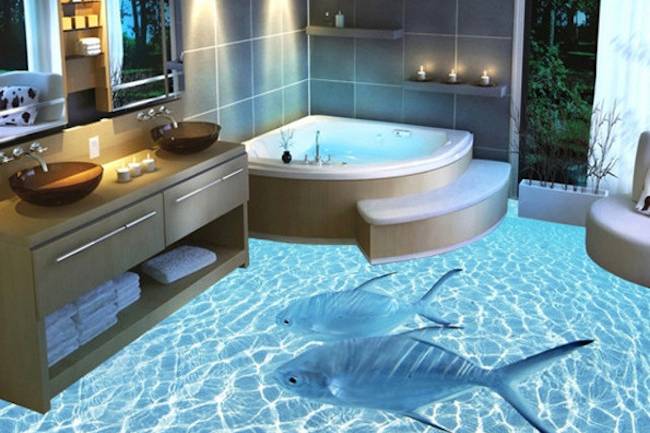
The 3D technology is achieving rising popularity. Epoxy 3D floor has been used a lot of and a lot of in searching malls, halls, offices, homes and residences thanks to its creativeness & high performance. This is the most recent craze within the fancy floor world. Epoxy 3D floor installation process involves laying down a layer of self leveling primer followed by the desired picture. This is then treated with a transparent 2 component epoxy or polyurethane to give the perfect photo depth. A level of protective varnish is the final step.
Here is that the complete guide 2018 to everything you would like to grasp concerning epoxy 3D Floor:
- 1. Pros & Cons
- 2. How to Install
- 3. How Much It Costs
Epoxy 3D Floor – Pros and Cons
Like all alternative flooring, epoxy 3D floors have both advantages and disadvantages. The positive characteristics of epoxy 3D floors are:
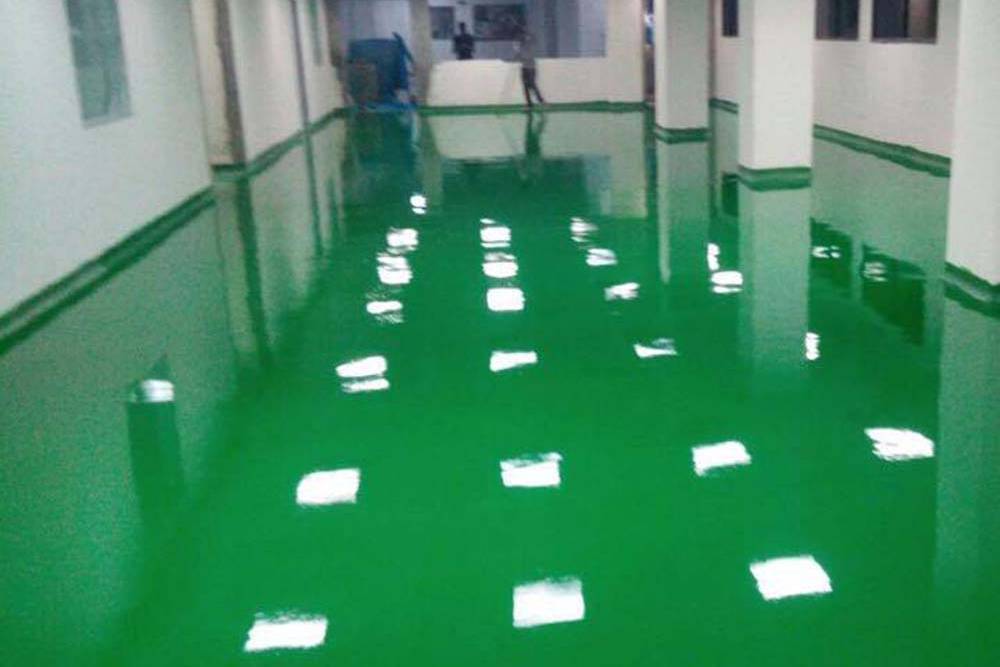
- Visual effect – The most significant advantage of epoxy 3D floor is the stunning visual effect. In addition to the gorgeous appearance, it can visually solve many problems of the room interior because of the unique aesthetic qualities. By choosing the right 3D floor design, color and pattern, with the help of self-leveling epoxy coatings you can even visually increase the room space. It can help to implement the infinite imagination of the designer and attracts the eyes endlessly.
- High strength – Epoxy is virtually impervious, and highly resistant to acids, chlorine and other materials such as bleaches and daily cleaners. For the very same reason, the floors are considered good for industrial sectors as well as for home. when properly installed, epoxy 3D floor can serve at least 15 years of age, without changing its color.
- Easy maintenance – Epoxy 3D floor has no seams, joints, cracks, pores and gaps make the 3D flooring is absolutely immune to any kind of dirt, dust, water and chemicals.
- Safe and hygiene friendly – Epoxy 3D floor does not accumulate dust and do not create a favorable environment for a variety of pathogens / bacteria. Epoxy floor materials used have no odor and corrosive fumes, and are safe for human health, which is mandatory and confirmed by the manufacturer certificates. It is important also that epoxy materials are very resistant to high temperatures such as in the event of fire.
- Fire resistance – Epoxy / polymers do not burn, it is one of the reasons that the coating used in manufacturing, warehouses, hospitals, child care centers and other places where increased control of fire safety are needed.
The Drawbacks of epoxy 3D floor:
- Hard to install and take time to cure – professional contractor and equipment are usually needed to properly install epoxy 3D floor. It takes 3 to 5 days, sometimes even longer to be fully cured.
- High cost –not enough professionals are available in the market, and demand for fashion spectacular floors are high. Popularity increases the cost, the materials themselves are not cheap either.
- Cold floor – epoxy 3D floor is as cold as tiles or concrete, so you should consider where best to use them.
Epoxy 3D Floor – How to Install
Installation of Epoxy 3D floor murals requires a lot of experience and does not tolerate even the slightest error, so the best option would be to hire a professional contractor. Advance Industrial Coatings has extensive experiences installing epoxy/polyurethane floors, feel free to call us at 904-425-7307 to request a free consultation and project estimate.
But if you are a very handy person and would like to install the 3D floor design by yourself, you can follow the following installation steps:
- Test the slab for moisture and vapor emissions. Moisture can cause adhesive failures, promote mold, mildew growth and result in curling or bubbling.
- Fully prepare the substrate surface. Use diamond grinding tools or sanding tools to prep the entire concrete floor. Patch as needed so there were no cracks, no bevels and the entire surface must be perfectly smooth. Make sure to cover and tape the surrounding area.
- Auto scrub and vacuum the floor to completely clean the surface. There shouldn’t be even the tiniest dust.
- Check the humidity. It is important that humidity throughout the area does not exceed 4%, otherwise in a week or two the beautiful newly installed floor will peel off.
- Apply the self-leveling epoxy primer.
- Install the 3D floor mural. If the basis of the pattern chosen is 3D floor mural, make sure bonding to the substrate was nowhere folds or creases.
- Install 2 layers of clear epoxy or more often, polyurethane to build a transparent layer of epoxy coating over the 3D floor mural. This layer will provide the desired perception of depth as well as the protection of the 3D floor mural. Such a layer should be installed with even more attention to detail and the much of care. All speck of dust, hairs, etc. need to be removed.
- If necessary, apply a top coat protective sealer.
The installation of 3D epoxy flooring may be a difficult and extended method and typically takes 3-7 days. The 3D epoxy flooring worth depends on several factors like substrate condition, total square footage and system complexity etc.
The 3D epoxy flooring worth depends on several factors like substrate condition, total sq. footage and system quality etc. The durability and period also are 2 major factors to see 3D epoxy flooring worth. High grade epoxy floor materials would be dearer.